By Paul Peebles
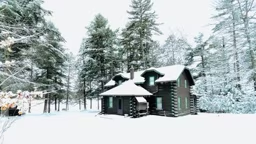
Thirty years ago, I became a log home owner by default when my parents purchased a farm near our home in Nashville. The property came with a broken-down log house that my mother was determined to restore, and she did.
In 1995, my mother’s beloved pet project burned down, so my brothers and I built her a new, modern log home. We worked hard and used the best materials and practices available at the time to make the home as comfortable and energy efficient as we could. We enjoyed this new cabin for many years.
Flash forward to May 2010 when catastrophic flooding hit our area and deposited 10 inches of water in our log home. This is when my eyes were truly opened to the advances in building materials and construction practices that had occurred in the past 15 years. But it wasn’t just the materials that had changed — I had also.
In this span, I began a career in the log home sealants and coatings business and had become a qualified and practicing Energy Star rater. (Raters are people who measure buildings using tools and technology to ensure homes perform efficiently.) Because we had to dismantle a good part of the home, we were able to pinpoint many faults in the way we’d originally built it.
We set our home on a crawlspace, a common practice in Tennessee. I had conscientiously vented the area, used a good-quality vapor barrier, insulated the subflooring with fiberglass batts and installed the HVAC system, electrical and plumbing under the floor.
After the water receded, we saw that the interior walls were fine, but the insulation was ruined. We dried everything out and then began to replace damaged components with new systems and materials. I learned that venting was smart, but creating a conditioned crawl space was smarter. (More on that later.) Donning my new Energy Star rater’s hat, I conducted an energy audit on the house.
The procedure consists of using a device called a blower-door unit, which is a piece of equipment that creates a vacuum comparable to 25 MPH winds coming from all directions at once. Gauges attached to the machine calculate how many openings to the outside are present in the building envelope and how often the total volume of air in the home is exchanged per hour. This sounds complicated, but ultimately what it tells you is how many gaps exist in the walls, ceiling and floor, allowing air to escape or come in.
While that machine was running, I also examined every nook and cranny in the cabin with an infrared camera to determine exactly where air leaks were. I was surprised to find leaks in places I thought were well sealed. I photographed and documented each breach as a reference. I attached still more equipment to the home’s ductwork to test for air-tightness and recorded the results. With the problem areas identified, we formed a plan for restoring our home.
For our purposes here, I’ll cover the two areas that have most bearing on energy efficiency.
Create a Conditioned Crawl Space
This is not a new concept, but was relatively new to my part of the country at the time. We first installed a padded multi-layer vapor barrier to the ground in the crawl space.
This material was taped where seams were needed, run up the wall and then cleated to the walls with pressure-treated 2-by-4s. We added concrete blocks to seal the old vents in the walls.
Sprayfoam insulation was then applied from the cleats, up the walls and onto the rim joists. All penetrations (holes drilled in the subfloor and rim-joists for wires and pipes) were sealed with caulking and/or sprayfoam.
Finally, we added a commercial dehumidifier and piped the water to the outside. This resulted in a low-humidity space that is controlled by the temperature of the earth below the vapor barrier. (It tends to be dry and about 55 degrees year-round.)
This is much more efficient than vented crawl spaces in which the temperature fluctuates according to the conditions outside. Sprayfoam insulation was also applied to all of the rigid ductwork, replacing the damaged batt insulation and making the ducts absolutely air tight.
Seal the Space
An air-tight structure is as important as the R-value of the walls and ceiling or roof insulation — maybe even more so. You cannot have good R-Value in walls or ceilings that leak air. We used the infrared pictures we took to guide our efforts. Using quality caulking material made specifically for log homes, we sealed the bottom logs to the subfloor along the entire perimeter of the home.
Then we caulked all of the interior window and door trim to the logs, the top of each log wall to the adjoining ceiling and the tongue-and-groove to the gable-end walls. The result made our home about 15 percent more energy efficient than it was before the flood. It saves us money on utilities, but surprisingly, the savings has not turned out to be the most pleasing aspect.
By minimizing air leakage, we also reduced or eliminated dust, moisture, pollen and insect infiltration. The fact that the home is cleaner and more comfortable is our best return on investment. I hope the experience you have with your new or existing log home is as fulfilling as ours has been.
We worked hard, but we did it together as a family to provide a place where we’ve watched our parents grow older and our children grow up. With a better, more energy-efficient home, we hope the future will hold as much enjoyment for our children’s children as it has for us.


_11868_2023-04-27_10-18-256x288.avif)


